We've enjoyed some mild and
sunny weather this week and that, combined with the increasingly lighter
afternoons, has given the air a deliciously spring-like feel. I'm wary of
declaring it spring too late though - do you remember how late spring is this year? Winter just seemed to go on and on. We have
a frequent rainfall fall right in the
middle and end of February , which I wrote about HERE

There is something about March
which makes me start tinkering with the house; looking at rooms anew and
finding ways to refresh them, or improving corners I don't like, just generally
pottering and creating.
OH, this beautiful
lovely piece of art lying here folded in a newspaper. Why don’t I use it
somewhere else!
Yes I made them
Won’t bore you with the details, but despite
my best intentions it has been very difficult to find any time for things to
remember of late. Without further ado, here is a little project that I
completed last year, which is nice and easy, with practical results.
I made these lovelies for my window behind my
computer table last year.

After repairing the window and
painting it in white in the hope that it might save me having to do it again
too soon. It has. The photo above was taken last year, and the curtain have had
a little wear till last 2 or 3 months ago. In the picture, perhaps
look a bit saggy round the lower edge. So try and ignore that and look at the
crisp clean ones in the image below, ok? Squares As you will have no doubt realized,
the good old granny square is the basis for this design. It doesn’t matter
which method you use. I haven’t included a granny square pattern, I just make
them in rounds and rounds only the last round with black transformed them into
squares ,so that they can easily attached with each other to make a big
fabric.ok!. Acrylic would be better than cotton or wool for this because it
needs to be hardwearing and stretchy. I used oswal yarn and a 3.5mm
hook.
My some of the in complete granny square is below, placed under the tiny baby’s in the niche.
Then came the cleaning time this
year and my niece demounted the curtain and after washing put them aside…………….
And yesterday I got them somewhere
on my way of cleaning the cupboard and I made use of it as my chair back cover …and
it successfully fitted on my computer table back ...both lengthwise as well as length
wise…..no sewing or crochet hook required just 2 tie-up cords I created new and transformed the curtain
into my chair cover see the pick below

You can vary the size according
to the depth that you want the chair back to be, but it probably needs to be at
least 15 cm square in order to have enough staying power when you fit it to the
back of the chair. Here it is a rectangle piece not sewed from sides.

Once you’ve made one, you will
be able to judge how many squares you will need to fit across the front and back
of the chair. I made four to fit across one side of the chair, and slip
stitched each square to the next as I worked, slip stitching into each of the
spaces along the side of the square. Ideally your squares should fit across the
front of the chair and overlap the sides slightly, so that you can make the
same number of squares for the back and join all them together to fit all the
way round the chair. Join all the squares and it will be a rectangle piece of colorful
fabric. If you want it to be quite a
snug fit, so make sure that it is pulled taut when you are measuring. My four
squares weren’t quite wide enough, so once I had joined them I worked another
couple of rows of granny square trebles around the rectangle. You can then make one long piece for the back
of the chair and join it to the first to form a rectangle piece that will fit
around the chair:
Edging when the squares are joined, work an
edging along the bottom with a row of granny trebles and ch-1 stitch all around
the piece.

Hang the cover on the chair;
make sure the piece is placed symmetrically on the chair. Take a ribbon with
beads at the end to secure the cover on the back of the chair.
You can see in the image above
that I’ve tied the cover with one cord each from both sides. These cords will be
long enough approx. 40cm each and tie beautiful beads at the ends. The cord may help to stay the cover in place firmly,
and to ensure that the ‘back’ is the same length as the ‘front’. You can see a
knot at the sides with knots of cord in the image below.
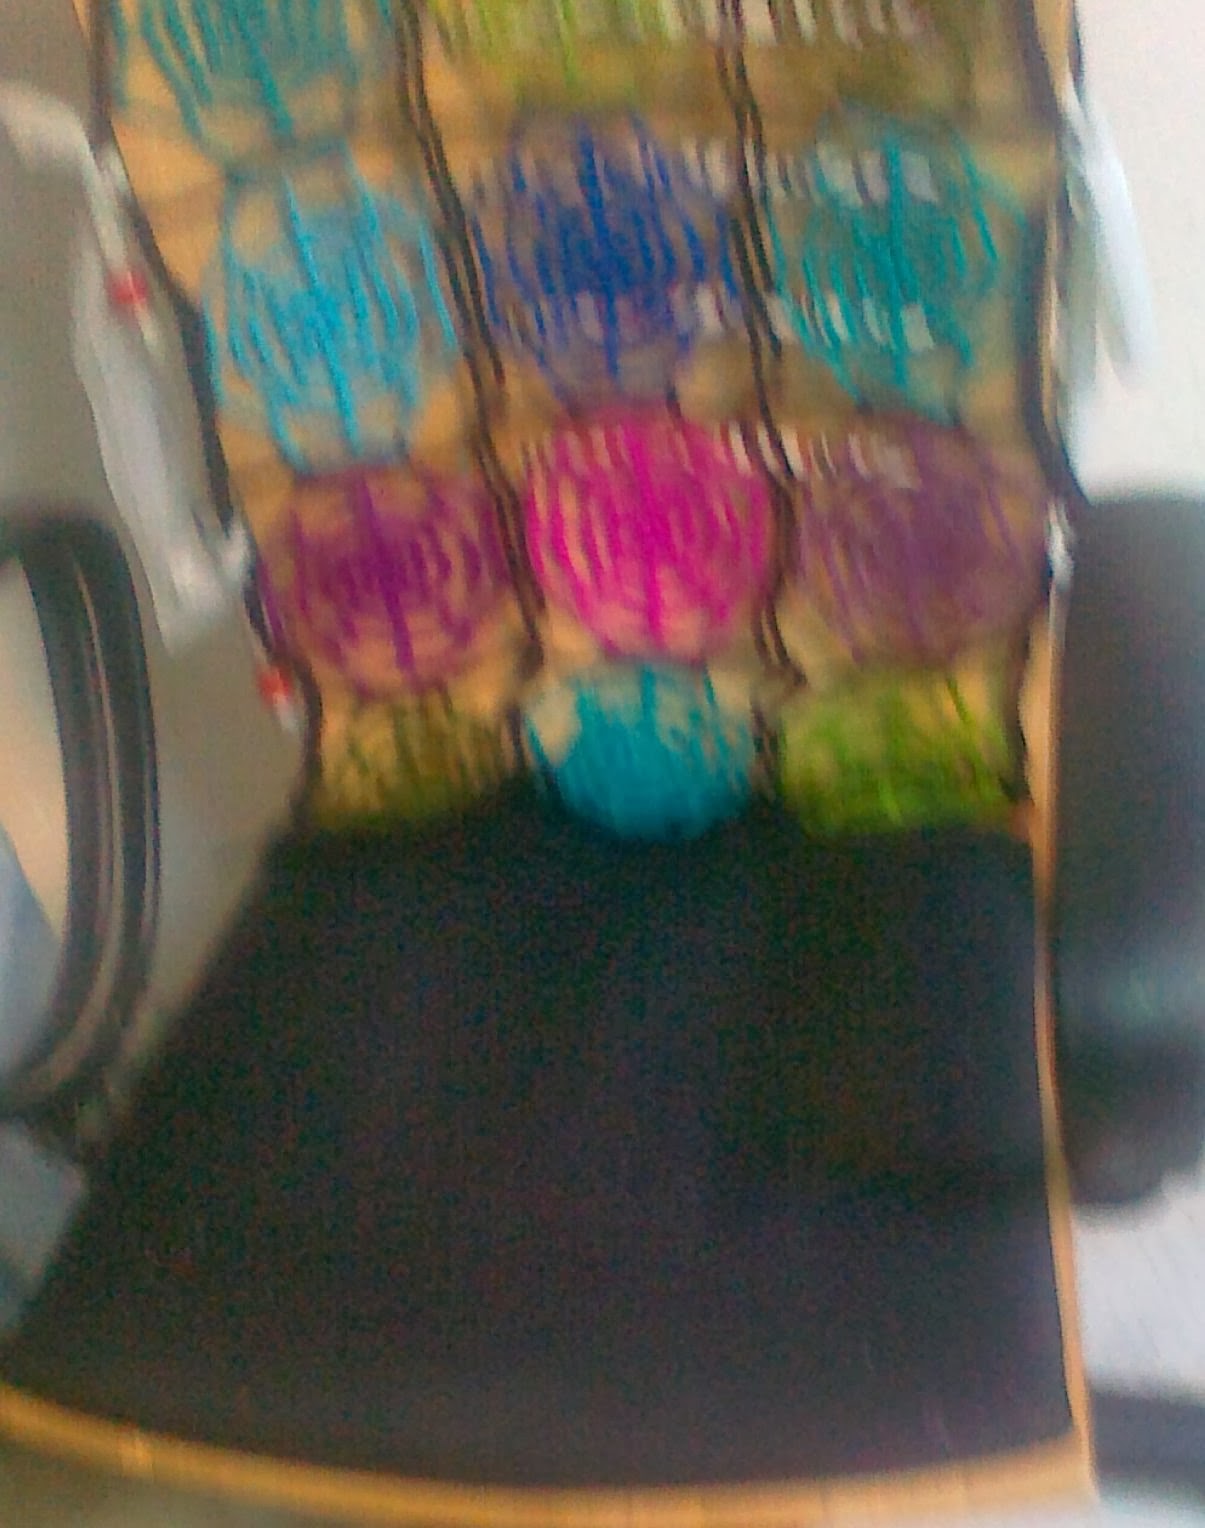 |
| just ignore the blurry pic |
I used two cord/ribbon (tulle here) to tie the cover to the chair, but in hindsight I think it might be better with an extra one in the middle as well to keep the cover from sagging. Each piece of cord/ribbon measured approx 40cm with a little extra allowed for finishing the raw ends. This was long enough to tie around the bar running along the top of the chair frame, but not so long that the tapes hung down beneath the bottom of the seat. You may need to adjust the length according to your own chair. Measure in from each side of the chair to see where these will be placed, making them far enough in from the edge to avoid the frame of the chair back. Mark the same distance in from each end of the cover. Find the midpoint of each piece of cord/ribbon and tie them to the cover on both sides, so there is an equal amount front and back to tie.
Tie in position and the chair
covers are ready.
xoxo
No comments:
Post a Comment